


 The kids loved those butterflies and wanted to spend every minute looking at them or talking about them. On the last day of the week we learned about the parts of the butterfly's body. Rather than just labeling a blank image of a butterfly, the kids made their own butterflies, added the markings of the Painted Lady (the type of butterfly they were observing), and labeled the body parts. They did a great just.
The students had the option of showing the butterfly from the top with its wings spread out, or from the side. I created tracers for the wings and body and handed out black and orange construction paper. The kids traced and cut out the pieces and then glued them onto another sheet of construction paper. They colored the wings so the butterflies looked like Painted Ladies. Finally, the students labeled the parts of the body, being careful to spell everything correctly. Some of those words are tough to spell!
 The kids cut around their butterflies so that all the artwork would fit on the bulletin board. The students were excited to share their butterflies with their teacher on Monday.
It was such a fantastic experience. I learned a lot of lessons I could never have learned in teacher classes and I discovered just how much work it is to prepare for each day. I am so inspired.
Return to main page.


 Supplies Needed:
 Gather your materials and cover your workspace.
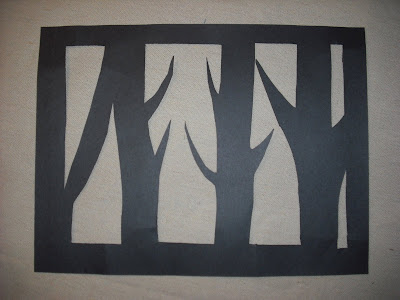 Set your tree paper aside and turn to your watercolor paper. You will use cool colors (blue, green, purple) to cover your paper. Paint with broad strokes and layer your colors on top of each other.
 Let your paper dry. This shouldn’t take too long.
 Hang and enjoy!


 Then I put the picture in the refrigerator to harden. I have now discovered that white chocolate doesn’t melt thinly enough to pour so I had to spread it with a knife which had the unfortunate effect of smearing some of the painting. And there for next time I will use a true chocolate background.
 Now I must go make the cheesecake!


