 Note: My aunt created the jazzy painting with the brown background, and I painted the picture of the dog walker with the blue background. We used a lot of small pieces because we wanted to have fun with the project, but you can use as few or as many shapes of any size. It would be interesting to create a collage painting using only circles, squares, rectangles, and triangles. You would really start to notice the way objects are just made up of shapes stuck together.
You will need two sessions to complete this project.
Supplies Needed:
Poster board shape tracers
Pencil
Foam board or heavy paper in the color of your background
Craft paint
Paintbrush
Water
 The fun thing about this project is that two people will use the same shapes to create completely different paintings. My aunt and I both wanted to use all the shapes available so we could show this to you. You can pick which shapes you want to include in your painting and which you want to leave out.
 Choose a sheet of paper or a piece of foam board in the color you’d like your background to be. You could also paint a solid color over the entire paper. Trust me; it’s a pain to paint the background after you’ve traced your image onto your paper. If you decide to paint your background, remember to let it dry before you go on.
Arrange the tracers into a picture on your paper. Move them around until you create an image you like. This seems like it would be difficult, but the shapes will form into pictures if you move them around enough. Remember, the color of the tracers doesn’t matter because you’re going to paint later.

 When you’re happy with the layout, trace each shape with your pencil. This is the trickiest part of this project because the shapes can move if you aren’t careful. Take your time.
 This is a good place to take a break if you need one.
The final step is to paint. At this point, you’re basically filling in a coloring book page. It’s much more satisfying, though, because you drew the outline yourself.


Allow your painting to dry and then compare it to the paintings your friends made using the same group of shape tracers. What similarities and differences do you notice?
Return to main page.

 I’m sure many of you have seen this project done elsewhere, but I love it. It’s quick and simple, and each child’s art piece is unique and creative. I like it as a beginning of the year project, especially if you’re studying fingerprints and fingerprinting. In Maryland, fingerprinting is often the first science unit that third graders complete, so hopefully this post is timely.
 Choose an ink color. This will be the body of your thumbprint animal. Press your thumb into the ink pad and then onto the center of your cardstock square. You should push your thumb straight down and then lift it straight up so your thumbprint doesn’t smear.
 Decide what animal you’d like to create. I made a butterfly, a frog, a spider, and a rabbit. You might choose to make a chick, a fly, or an animal from your own imagination. Draw the face and details with a fine-tipped marker.
 Sign your name at the bottom of your square. Frame and enjoy!


 Supplies Needed:
 Gather your materials and cover your workspace.
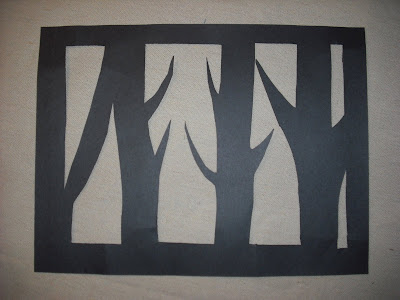 Set your tree paper aside and turn to your watercolor paper. You will use cool colors (blue, green, purple) to cover your paper. Paint with broad strokes and layer your colors on top of each other.
 Let your paper dry. This shouldn’t take too long.
 Hang and enjoy!
 So today, sculpt your own clay birthday cake.
 This project would be much simpler if you use colored, store-bought polymer clay rather than making your own clay and painting it. That said, if you enjoy a challenge, follow these to directions to make your own clay for this project. A warning: it’s tough to mix the clay so an adult should at least help.
 Spread a sheet of wax paper over your workspace. Begin with a ball of clay that is about two handfuls big. Roll it around in your hands until it is a smooth ball. Then, shape it into a rounded square by pressing each side gently onto the wax paper. When it is the shape of a small cake, set it aside.
 Cut a square of aluminum foil. This is the cake tray. Place the cake on the tray.
 Let the cake dry. It needs to dry at least over night before you paint it.
 Remember, this one’s just for decoration!
 Supplies Needed:
 This is a messy one. If you’re having nice weather I recommend taking your whole art studio outside today. Wear old clothes and, no matter what, cover your workspace.
 You want to use a dry brush for this. A hard-bristled toothbrush would be better than a paintbrush. Squirt some paint onto the end of your brush. Aim the brush at the pot and run your thumb across the bristles. This will send the paint flying in all directions. That’s why you’re outside and wearing old clothes!
 Rinse the brush and then squirt a new color onto the bristles. Splatter the paint across the pot. Continue adding colors until you are happy with your pot. Do the same with the saucer. It will save you some time and brush washings if you do the pot and the saucer at the same time.
 When the pot has dried (about 30 minutes), paint black lines between each square, rectangle, and line.
 You may want to let the pot dry and do another coat of stripes in the opposite direction (from the lip to the base). I chose not to.


 Print a blank map like
  Next, label the states. This is where having a larger map comes in handy. It might even be a good idea to print the map in sections onto several sheets of paper and then tape or glue them together when you finish. Use your white crayon to write the names of the states on the map. You’ll want to use abbreviations for some of the smaller states. In my example, I only labeled a few of the states. You should label them all.
 When you’ve finished, the state lines and names will stand out against the colors of your map. Hang and enjoy!
 Supplies Needed:
 I’m going to walk you through the steps to create this bird, but keep in mind that you can make any animal like this. If you have been studying butterflies for example, you might want to make a butterfly.
 Next, prepare the cardboard. This will become your tree. Peel the back off of the cardboard so you’re left will ridges. Squeeze some brown paint onto a palette or plastic lid. Cut another small strip of cardboard and dip the edge in the paint. Dab off some of the paint and then stamp the edge onto the large piece of cardboard several times. You’re just trying to make the cardboard look more like a tree. Work until you’re happy with the look of your tree, then set it aside to dry. It will dry quickly.
 Next, glue down the leaves and grass. Use white glue when gluing to cardboard (because of the ridges) and a glue stick when gluing to the background page.
 Remember to sign your name somewhere on your masterpiece!
 Dr. Seuss’ picture book illustrations were completed in pen and ink, so let’s use markers for our illustrations. The result will be pretty close.
 Finally, write a few rhyming lines about your birthday adventure.
 First, read Dr. Seuss’ The Cat in the Hat. Write a sentence each about the beginning, the rising action, the climax, the falling action, and the conclusion. You’ll use this later when you write your summary.
 Cut out five strips of red construction paper and lay them across your white hat in stripes. Glue down the left end of each strip. Remember to press down on the glued section for about ten seconds before you move on to the next strip. Trim the extra red paper.
 Write the title of the book and the author's name on the brim of the hat.