


Yes, it’s a second bookmark project. Can you really have too many, though? Today, you’ll paint your own picture before turning it into a bookmark.
Supplies Needed:
Crayons
Watercolor paints
Paintbrush
Construction paper
Thick watercolor or sketch paper
Scissors
Ribbon
Glue Stick
Hole punch
Ruler
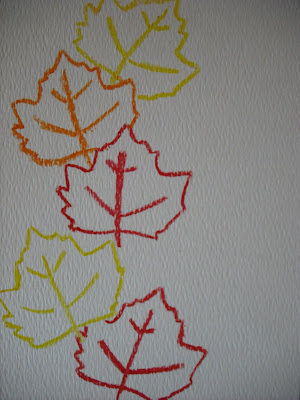
 I decided to make a fall-themed bookmark but you can choose any subject you want to paint. In crayon, draw the outline of your picture or design onto your thick paper. Add any details that you want to stand out. Make sure to press hard with your crayon. The watercolor will not stick to the waxy crayon and your outlines will show through. When you’re happy with your picture, fill it in with watercolors. Watercolor dries pretty quickly but you’ll want to make sure to wait until it is completely dry before you continue.
 Use your ruler to cut a bookmark-sized rectangle out of your painting. Choose the most interesting strip of the painting. Use your ruler to mark where you want to cut. It doesn’t matter how thick you make your bookmark (as long as it isn’t thicker than a book!) or how long you make it. Cut it out.
Next, spread glue over the back of your bookmark picture. Glue the picture to your piece of construction paper and then trim away the extra. If you’re feeling fancy, try trimming your paper with decorative-edge scissors.
 Punch a hole near the top of your book mark. Fold your ribbon in half and thread the folded end through the hole. Run the ends of the ribbon through the loop and tighten.
 If you’d like, write the date and your name (as the artist) on the back of your bookmark. Enjoy your bookmark at home or at school, or give it to a friend or relative as a gift!
Return to main page.
Supplies Needed:
Crayons
Watercolor paints
Paintbrush
Construction paper
Thick watercolor or sketch paper
Scissors
Ribbon
Glue Stick
Hole punch
Ruler
I decided to make a fall-themed bookmark but you can choose any subject you want to paint. In crayon, draw the outline of your picture or design onto your thick paper. Add any details that you want to stand out. Make sure to press hard with your crayon. The watercolor will not stick to the waxy crayon and your outlines will show through. When you’re happy with your picture, fill it in with watercolors. Watercolor dries pretty quickly but you’ll want to make sure to wait until it is completely dry before you continue.Use your ruler to cut a bookmark-sized rectangle out of your painting. Choose the most interesting strip of the painting. Use your ruler to mark where you want to cut. It doesn’t matter how thick you make your bookmark (as long as it isn’t thicker than a book!) or how long you make it. Cut it out.Next, spread glue over the back of your bookmark picture. Glue the picture to your piece of construction paper and then trim away the extra. If you’re feeling fancy, try trimming your paper with decorative-edge scissors.
Punch a hole near the top of your book mark. Fold your ribbon in half and thread the folded end through the hole. Run the ends of the ribbon through the loop and tighten.If you’d like, write the date and your name (as the artist) on the back of your bookmark. Enjoy your bookmark at home or at school, or give it to a friend or relative as a gift!Return to main page.


No comments:
Post a Comment