Of course you don't need step-by-step directions for this one so I'll just show you my own self-portrait.

I hope you have as much fun with this as I did. Happy Macaroni Self-Portrait Day!
Return to main page.


 Supplies Needed:
 Gather your materials and cover your workspace.
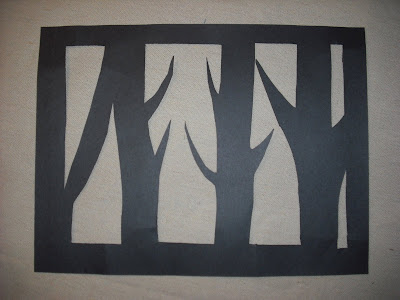 Set your tree paper aside and turn to your watercolor paper. You will use cool colors (blue, green, purple) to cover your paper. Paint with broad strokes and layer your colors on top of each other.
 Let your paper dry. This shouldn’t take too long.
 Hang and enjoy!


 Then I put the picture in the refrigerator to harden. I have now discovered that white chocolate doesn’t melt thinly enough to pour so I had to spread it with a knife which had the unfortunate effect of smearing some of the painting. And there for next time I will use a true chocolate background.
 Now I must go make the cheesecake!
To Peter: My chocolate art won’t last long either. But I did make it 24 hours ahead of the cheesecake, so it should last at least that long.
 So today, sculpt your own clay birthday cake.
 This project would be much simpler if you use colored, store-bought polymer clay rather than making your own clay and painting it. That said, if you enjoy a challenge, follow these to directions to make your own clay for this project. A warning: it’s tough to mix the clay so an adult should at least help.
 Spread a sheet of wax paper over your workspace. Begin with a ball of clay that is about two handfuls big. Roll it around in your hands until it is a smooth ball. Then, shape it into a rounded square by pressing each side gently onto the wax paper. When it is the shape of a small cake, set it aside.
 Cut a square of aluminum foil. This is the cake tray. Place the cake on the tray.
 Let the cake dry. It needs to dry at least over night before you paint it.
 Remember, this one’s just for decoration!


