


Welcome to Art Book Friday! I’ve already told you about a great board book that uses art to teach colors. Today I want to share two picture books with you: one that teaches numbers and one that teaches shapes.
Museum 1 2 3 was created by the Metropolitan Museum of Art in New York. The reader looks at a painting and then counts how many of a particular item are shown. “How many red buses rush through busy city streets,” the book asks. When you turn the page, you find the answer is 3. The book illustrates each number (from 1 to 10) with 5 paintings.
Museum Shapes, also created by the Metropolitan Museum of Art, is set up the same way. Shapes range from common circles to crescents and arches. There are 10 shapes in all, each illustrated by 5 paintings.
I love these books because the paintings shown are not always familiar ones. You will find Vincent van Gogh and Edgar Degas but you will also find many artists you’ve never heard of before. Also, the art comes from all time periods and from all over the world.
These are both great read alouds for young children.
Have a fantastic weekend!
Return to main page.
Friday, August 29, 2008
Wednesday, August 27, 2008
Mandalas
In many eastern religions such as Buddhism and Hinduism, a mandala is an image that a person creates to help him or her meditate. The mandala represents the entire universe. It is the palace in which a god lives, so at the center of each mandala is a symbol or picture of that particular god.
 Surrounding the god are the walls of the palace. The palace always has four, decorative gates—one on each wall. Around the palace are more circles. Each represents something different.
As a person creates a mandala, he or she meditates about every part of it.
Mandalas can be made out many different materials but the most impressive are sand mandalas. Tibetan monks place grains of colored sand, one-by-one, on a flat surface. Four monks work together on large sand mandalas. Each monk works on one quadrant of the mandala. All four monks must work at the same speed so that they all finish at the same time.
Go look at the pictures on this website to see monks creating a mandala. I especially like the close-up of the mandala. You really can see every grain of sand.
When the monks have finished creating the sand mandala, it is swept into water. This is meant to release the god from the mandala.
Return to main page.
Surrounding the god are the walls of the palace. The palace always has four, decorative gates—one on each wall. Around the palace are more circles. Each represents something different.As a person creates a mandala, he or she meditates about every part of it.
Mandalas can be made out many different materials but the most impressive are sand mandalas. Tibetan monks place grains of colored sand, one-by-one, on a flat surface. Four monks work together on large sand mandalas. Each monk works on one quadrant of the mandala. All four monks must work at the same speed so that they all finish at the same time.
Go look at the pictures on this website to see monks creating a mandala. I especially like the close-up of the mandala. You really can see every grain of sand.
When the monks have finished creating the sand mandala, it is swept into water. This is meant to release the god from the mandala.
Return to main page.
Tuesday, August 26, 2008
Create Your Own Talavera-Inspired Coasters
Today, make your own Talavera-inspired coasters! I love this project. It’s simple, inexpensive, and fun.
Yesterday you learned about how Talavera pottery is made. It would be tough to go through all those steps at home. Most of us don’t have kilns in our houses. Instead, pick up a couple of small tiles from your local hardware store and paint your designs with glass paint.
Supplies Needed:
Small Tile
Glass Paint
Paintbrush
Pencil
Rubbing Alcohol
Cotton Balls

Cover your work space with newspaper. Clean your tile with rubbing alcohol and let it dry. (This is something an adult should help you with.)
Decide what you want to paint on your tile. If you need some inspiration, check out this site. Draw your design lightly, in pencil.

Fill in your drawing with glass paint. I filled in all the blue parts, let them dry, then filled in all the red parts and let them dry. It took a little longer to paint in sections like that, but I didn’t end up with paint all over my hands.
If you want a quicker project, try using only one color. You can find Talavera pottery that is only blue and white. Maybe those pieces will inspire you.

Glass paint needs to dry for a long time. Read the instructions on your paint. Some paints give you the option of baking your artwork. In my experience, the paints that you can bake stay on better than the ones you have to let air dry.
When your tile is completely dry, use it as a coaster or have an adult frame it and hang it on the wall.
Coasters make nice gifts for parents and grandparents.
Return to main page.
Monday, August 25, 2008
Talavera Pottery
Around 1500, the Spanish began making beautiful, hand-painted Talavera pottery. The Spanish monks liked the pottery so much that they introduced it to their new colony in Mexico. The people of Puebla, Mexico perfected the technique and today they are famous for their Talavera pottery.
A Mexican or Spanish artisan begins by kneading together two different types of clay. The clay air-dries until it can be molded into shapes. The artisan then shapes the clay with his hands, on a pottery wheel, or in a mold. The pottery air-dries some more and then is fired in a kiln. Next, the artisan glazes the pottery and then hand-paints it using six specific colors (red, green, black, brown, blue, and yellow). Finally, the pottery is fired again.
This is a long and complex process, as you can see. People love Talavera pottery and are willing to pay a lot of money for it. Because of this, some people in Mexico began making fake Talavera pottery. Real Mexican Talavera artisans have to pass tests twice a year. They also have to follow certain rules and sign every piece of pottery they make.
Click here for some examples of Talavera pottery.
Tomorrow I’ll show you how to make your own coasters inspired by Talavera pottery.
Return to main page.
Friday, August 22, 2008
The Paper Crane by Molly Bang
You learned yesterday that the Japanese consider paper cranes to be lucky. In The Paper Crane, Molly Bang tells a wonderful story a one family who experiences the luck of a paper crane.
The family’s once successful restaurant is not doing well. A highway has been built very near the restaurant and now cars just drive by. People don’t come in to eat anymore. One day a stranger comes in and the restaurant owner serves him a meal. To repay the owner for his kindness, the stranger folds a paper crane out of a napkin. When the crane comes to life the restaurant is suddenly very popular. Everyone wants to see the paper crane that has come to life!
The illustrations are perfect for the book. Molly Bang created paper collages and then photographed them. These images became the illustrations.
I hope you enjoy this picture book as much as I do!
Return to main page.
Thursday, August 21, 2008
Origami Masters
Now that you have folded some of your own origami, take a look at the art of some origami masters. I have no idea how they do it, but it’s incredible.
Robert J. Lang’s origami looks more realistic than a lot of clay sculpture that I’ve seen. I especially like the humming bird and the people. Click through the list on the left side of screen so you don’t miss anything.
Robert J. Lang’s origami looks more realistic than a lot of clay sculpture that I’ve seen. I especially like the humming bird and the people. Click through the list on the left side of screen so you don’t miss anything.
Kamiya Satoshi folds huge sheets of paper into complex creatures such as dragons and whales. Check out this 4 minute video to see Satoshi at work. Please note the video is in Japanese and sped up. It’s pretty cool, though. Satoshi begins with a 70cm. by 70cm. square piece of paper and ends with a phoenix.
Enjoy!
Return to main page.
Wednesday, August 20, 2008
Origami
Origami is the Japanese art of paper folding. You have probably seen paper cranes before, and I’m sure you’ve folded a paper airplane. Both paper cranes and paper airplanes are origami (but that doesn’t mean you should play with either in class!).
The Chinese had paper long before the Japanese. Sometime after 500AD the Chinese introduced the paper to the Japanese. It wasn’t long before they began folding paper into art.
Origami became very important to the Japanese. Origami folded around dried meat was often attached to gifts. This origami, called noshi, was thought to bring luck.
Origami plays a part at some Japanese weddings, too. Origami butterflies are placed on wine bottles to represent the bride and groom.
The best-known origami legend has to do with paper cranes. It is believed that if you fold 1000 paper cranes, one of your wishes will be granted. It would take a long time to fold 1000 paper cranes but the result would be beautiful. And who knows, maybe one of your wishes will come true!
Fold your own origami cranes, butterflies, paper airplanes, and more at this great site!
Return to main page.
Monday, August 18, 2008
Berthe Morisot
Berthe Morisot was born in 1841 to a wealthy government official. When Morisot was 11, her family moved to Paris. Because her father was important, and because the family had money, Morisot and her two sisters received proper education. They had tutors for many subjects including art.
 Berthe Morisot and her sister Edma both showed artistic talent and decided to become painters. Though very few women became professional painters in the 1800s, the sisters were encouraged by their family.
The young women painted side-by-side until Edma got married and decided to become a fulltime mother.
 Berthe Morisot showed her work at the Paris Salon each year for nine years. She met Manet. She posed for him and the two painters learned many things from each other.
Morisot then made friends with several Impressionist painters and became an Impressionist herself. Morisot showed her work with the Impressionists until the final exhibition in 1886. She missed only one of the eight Impressionist exhibitions.
When she was 33, Morisot married Edouard Manet’s brother, Eugene. They had a daughter, Julie, who became Morisot’s favorite subject to paint. After Eugene died, Julie and her mother painted side-by-side.
Morisot died in 1895.
 Berthe Morisot, like Mary Cassatt, painted a lot of family scenes. Most of her paintings show women and children. She used quick brush strokes, in the Impressionist style, and preferred light colors. You won’t see black in Morisot’s paintings, though there are sometime touches of dark grey, dark blue, or dark green.
The paintings above, in order, are The Cradle, Reading, and Lady at her Toilette.
Return to main page.
Friday, August 15, 2008
The Art Lesson by Tomie dePaola
The Art Lesson by Tomie dePaola is the story of a boy who loves to draw. He goes to school, excited to begin art class, and finds that his art teacher expects the students to copy her drawings off the board. Tommy wants to be creative! He wants to use his brand new birthday crayons, not the powdery school paints! You’ll have to read the story to find out how Tommy deals with this problem.
This story is somewhat autobiographical. Tomie dePaola is, of course, an author and illustrator of children’s books. It’s inspiring to read the story of a boy who grows up to do exactly what he always wanted to do.
I recommend this book to anyone who loves to draw.
I’d love to hear your opinions about this book. Please feel free to leave comments.
Return to main page.
Wednesday, August 13, 2008
Museum History
Awhile back I read a book that talked about the way museums have changed over the centuries. I was thinking about how differently museums are set up today than they were in the 1700s. I found it interesting and thought I would share the information with you.
Before the 1800s, museums were places where wealthy people could go to look at art. These wealthy people thought of workers as dirty and noisy. They certainly didn’t want dirty, noisy people ruining their trips to the museum. Because of this, museums were only open when workers would be working. They also had dress codes that made sure that workers wouldn’t be able to afford the right clothing to visit.
Paintings were hung from floor to ceiling, in no particular order. There were no identification cards to give visitors information about the paintings. Even if a worker were somehow able to visit a museum, he would have no idea what he was looking at.
In 1803, the King of France decided that everyone should be able to visit museums. He wanted museums to help educate people. On his orders, the Louvre stopped enforcing its dress code and changed its hours so that workers could visit. The museum also began to arrange its artwork into exhibits which included informational cards. At first, the paintings were arranged into only four categories: Dutch, French, Flemish, and Italian. Over time the exhibits became more and more specific.
Today, paintings are hung only at eye level and every painting has its own informational card. Sometimes you can receive more information about a painting by listening to an audio tour. Many museums even offer guided tours. There are often events and activities designed to help kids understand the artwork they see. Museums truly do try to educate their visitors about art.
Return to main page.
Tuesday, August 12, 2008
Create Your Own Fine Art Puzzle
Here is another use for those old calendar pictures. If you don’t have any old calendars you can print a picture from the internet. You could also use a photo (just make sure to get permission first!).
Supplies Needed:
Picture
Poster board
Glue stick
Scissors
Decorative-edged scissors (optional)
 Spread glue over every inch of your picture and stick it to your piece of poster board. If you feel that your puzzle is still too thin, glue a second sheet of poster board to the back.
 Use either your decorative-edged scissors or your regular scissors to cut the picture into pieces. I’ve given you examples of both. A third option is to trace the pieces of a puzzle that you already have. If you choose to do this, make sure your puzzles are the same size before you start. Also, trace the pieces onto the back so your pencil marks don’t show on the picture.
 Enjoy your new puzzle!
Return to main page.
Supplies Needed:
Picture
Poster board
Glue stick
Scissors
Decorative-edged scissors (optional)
Spread glue over every inch of your picture and stick it to your piece of poster board. If you feel that your puzzle is still too thin, glue a second sheet of poster board to the back.Use either your decorative-edged scissors or your regular scissors to cut the picture into pieces. I’ve given you examples of both. A third option is to trace the pieces of a puzzle that you already have. If you choose to do this, make sure your puzzles are the same size before you start. Also, trace the pieces onto the back so your pencil marks don’t show on the picture.Enjoy your new puzzle!Return to main page.
Monday, August 11, 2008
Van Gogh X-Ray
I know I should talk about the Olympics opening ceremony but I didn’t see much of it. Yes, I am ashamed of myself for not watching. Not to worry, though—my mom caught it on her DVR so I will get to see it. I hope you all enjoyed that display of art and culture.
I did, however, see that amazing Men’s 4X100 Meter Free Style Relay. If you missed it, go watch it. It was a nail-biter!
Okay, let’s get to the art…
As you may know, Vincent van Gogh sold only one painting during his lifetime. His brother, Theo, paid for his housing and food, and his paints and canvases. But van Gogh never had enough canvases for the paintings he wanted to create. Because of this, van Gogh sometimes painted over older paintings when he didn’t have blank canvases.
 It was possible to tell which paintings had been created on top of other pictures, but experts hadn’t figured out to see and recreate the older images. Until now. A group of scientists has used a new x-ray method to find a hidden picture behind a Vincent van Gogh painting.
In late-1884 and early-1885, van Gogh painted a series of small portraits which showed the heads of Dutch peasants in their huts. The paintings are very dark, like much of van Gogh’s early work. The scientists found one of these paintings hidden behind a painting van Gogh created in 1887, Patch of Grass.
This is pretty amazing technology. You can see the uncovered image, and read about how the scientists did it, here.
Return to main page.
I did, however, see that amazing Men’s 4X100 Meter Free Style Relay. If you missed it, go watch it. It was a nail-biter!
Okay, let’s get to the art…
As you may know, Vincent van Gogh sold only one painting during his lifetime. His brother, Theo, paid for his housing and food, and his paints and canvases. But van Gogh never had enough canvases for the paintings he wanted to create. Because of this, van Gogh sometimes painted over older paintings when he didn’t have blank canvases.
It was possible to tell which paintings had been created on top of other pictures, but experts hadn’t figured out to see and recreate the older images. Until now. A group of scientists has used a new x-ray method to find a hidden picture behind a Vincent van Gogh painting.In late-1884 and early-1885, van Gogh painted a series of small portraits which showed the heads of Dutch peasants in their huts. The paintings are very dark, like much of van Gogh’s early work. The scientists found one of these paintings hidden behind a painting van Gogh created in 1887, Patch of Grass.
This is pretty amazing technology. You can see the uncovered image, and read about how the scientists did it, here.
Return to main page.
Friday, August 8, 2008
The Magical Garden of Claude Monet by Laurence Anholt
From now on (actually from last week on), Fridays will be book review days here at Art Smarts 4 Kids. If you have read the book, please feel free to comment on whether you liked or disliked it (but please be nice).
Today’s book is The Magical Garden of Claude Monet by Laurence Anholt. This is a beautiful picture book that is a perfect read-aloud bedtime story.
Julie lives in Paris with her mother, a painter. She wishes she had a garden so her mother decides to take her to visit Claude Monet in his garden outside the city. They take a train to Monet’s huge garden and Julie is taken for a tour by the artist, himself.
The illustrations were inspired by Monet’s paintings but Anholt has put some of his own style into the pictures.
The book is based on a story about the daughter of Berthe Morisot. I have not yet written about Morisot, but I will tell you about her and her art next week.
Enjoy your weekend!
Return to main page.
Thursday, August 7, 2008
Paint Your Own Bookmark
Yes, it’s a second bookmark project. Can you really have too many, though? Today, you’ll paint your own picture before turning it into a bookmark.
Supplies Needed:
Crayons
Watercolor paints
Paintbrush
Construction paper
Thick watercolor or sketch paper
Scissors
Ribbon
Glue Stick
Hole punch
Ruler
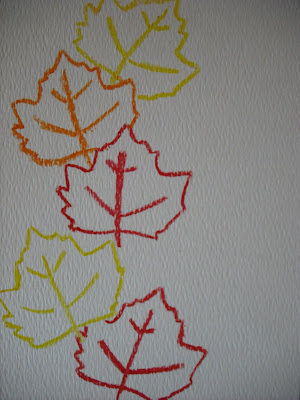
 I decided to make a fall-themed bookmark but you can choose any subject you want to paint. In crayon, draw the outline of your picture or design onto your thick paper. Add any details that you want to stand out. Make sure to press hard with your crayon. The watercolor will not stick to the waxy crayon and your outlines will show through. When you’re happy with your picture, fill it in with watercolors. Watercolor dries pretty quickly but you’ll want to make sure to wait until it is completely dry before you continue.
 Use your ruler to cut a bookmark-sized rectangle out of your painting. Choose the most interesting strip of the painting. Use your ruler to mark where you want to cut. It doesn’t matter how thick you make your bookmark (as long as it isn’t thicker than a book!) or how long you make it. Cut it out.
Next, spread glue over the back of your bookmark picture. Glue the picture to your piece of construction paper and then trim away the extra. If you’re feeling fancy, try trimming your paper with decorative-edge scissors.
 Punch a hole near the top of your book mark. Fold your ribbon in half and thread the folded end through the hole. Run the ends of the ribbon through the loop and tighten.
 If you’d like, write the date and your name (as the artist) on the back of your bookmark. Enjoy your bookmark at home or at school, or give it to a friend or relative as a gift!
Return to main page.
Supplies Needed:
Crayons
Watercolor paints
Paintbrush
Construction paper
Thick watercolor or sketch paper
Scissors
Ribbon
Glue Stick
Hole punch
Ruler
I decided to make a fall-themed bookmark but you can choose any subject you want to paint. In crayon, draw the outline of your picture or design onto your thick paper. Add any details that you want to stand out. Make sure to press hard with your crayon. The watercolor will not stick to the waxy crayon and your outlines will show through. When you’re happy with your picture, fill it in with watercolors. Watercolor dries pretty quickly but you’ll want to make sure to wait until it is completely dry before you continue.Use your ruler to cut a bookmark-sized rectangle out of your painting. Choose the most interesting strip of the painting. Use your ruler to mark where you want to cut. It doesn’t matter how thick you make your bookmark (as long as it isn’t thicker than a book!) or how long you make it. Cut it out.Next, spread glue over the back of your bookmark picture. Glue the picture to your piece of construction paper and then trim away the extra. If you’re feeling fancy, try trimming your paper with decorative-edge scissors.
Punch a hole near the top of your book mark. Fold your ribbon in half and thread the folded end through the hole. Run the ends of the ribbon through the loop and tighten.If you’d like, write the date and your name (as the artist) on the back of your bookmark. Enjoy your bookmark at home or at school, or give it to a friend or relative as a gift!Return to main page.
Wednesday, August 6, 2008
Create Your Own Fine Art Bookmark
Today I’ll show you how to make your own fine art bookmark. This project is quick and easy and you probably already have everything you need to complete it.
If you’re anything like me, you have tons of old art calendars lying around. If you’re not like me, you can find a picture online and print it off yourself. You’ll want to use paper that is thicker than your average printer paper. Try white construction paper. The archives of this site are a good place to start your search for a picture.
Supplies Needed:
Calendar page
Construction paper
Scissors
Ribbon
Glue Stick
Hole punch
Ruler
 Choose an interesting strip of the painting and use your ruler to mark where you want to cut. It doesn’t matter how thick you make your bookmark (as long as it isn’t thicker than a book!) or how long you make it. Cut it out.
Next, spread glue over the back of your bookmark picture. Glue the picture to your piece of construction paper and then trim away the extra. If you’re feeling fancy, Try trimming your paper with decorative-edge scissors.
 Punch a hole near the top of your book mark. Fold your ribbon in half and thread the folded end through the hole. Run the ends of the ribbon through the loop and tighten.
 If you’d like, write the date, the artist, and the painting on the back of your bookmark. My bookmark is a detail from Vincent van Gogh's Starry Night Over the Rhone. If you're inspired to, make several bookmarks from the same picture. Now you have a beautiful bookmark to use when you go back to school!
Return to main page.
If you’re anything like me, you have tons of old art calendars lying around. If you’re not like me, you can find a picture online and print it off yourself. You’ll want to use paper that is thicker than your average printer paper. Try white construction paper. The archives of this site are a good place to start your search for a picture.
Supplies Needed:
Calendar page
Construction paper
Scissors
Ribbon
Glue Stick
Hole punch
Ruler
Choose an interesting strip of the painting and use your ruler to mark where you want to cut. It doesn’t matter how thick you make your bookmark (as long as it isn’t thicker than a book!) or how long you make it. Cut it out.Next, spread glue over the back of your bookmark picture. Glue the picture to your piece of construction paper and then trim away the extra. If you’re feeling fancy, Try trimming your paper with decorative-edge scissors.
Punch a hole near the top of your book mark. Fold your ribbon in half and thread the folded end through the hole. Run the ends of the ribbon through the loop and tighten.If you’d like, write the date, the artist, and the painting on the back of your bookmark. My bookmark is a detail from Vincent van Gogh's Starry Night Over the Rhone. If you're inspired to, make several bookmarks from the same picture. Now you have a beautiful bookmark to use when you go back to school!Return to main page.
Tuesday, August 5, 2008
Create Your Own Kaleidoscope
We haven't been having enough fun around here lately. I'm going to post a lot more art and craft projects in the next couple weeks. Fun is what summer break is for, after all!
I found this great project today. It is definitely a project for older kids and they will need adult help. Fortunately, adults will like this project, too! If you want to make this a family project, younger children can help their older brother or sister or parent by gluing sequins and beads to the lid (but they should use a more kid-safe glue).
In case you had the same idea that I had, aluminum foil cannot be used instead of reflective contact paper. It isn't shiny enough and the beads and sequins don't reflect like they would in a real kaleidoscope.
I also tried using wax paper and tissue paper instead of a plastic lid with beads and sequins. That doesn't work either. Follow the directions and the result is beautiful. Your own working, handmade kaleidoscope!
Here is the link to the video at eHow.
Return to main page.
Monday, August 4, 2008
Phidias and Classical Greek Sculpture
Phidias was a great Greek sculptor who lived and worked during the Classical Period of Greek art. During the Classical Period (440BC- 323BC), sculptors were interested in showing people and animals from all sides and from all angles. Sculptors wanted people to be able to walk around their sculptures and admire every part of them. They still carved decorations into walls, but they produced more large, free-standing sculpture.
During the Classical Period, artists focused on learning how to create perfect bodies. Sculptures were meant to celebrate man as the perfect creation of the gods. Sculpture didn’t show fat or wrinkles. Instead, it showed strong, muscular bodies.
 Phidias was an important sculptor during the Classical Period. He directed the sculptors who created the Parthenon friezes (sculptures that are set into walls) at the Parthenon. Experts believe that Phidias designed the building and decoration. He also created the sculpture of Athena that stood at the Parthenon. Above is an example of a relief from the Parthenon.
 Experts also believe that Phidias created that huge sculpture of Zeus that stood at the Temple of Zeus at Olympia. The sculpture was seven times the size of a man. It was carved from ivory and decorated with gold. It is counted among the Seven Ancient Wonders of the World. Above is a drawing of what the sculpture may have looked like.
During the Classical Period, artists focused on learning how to create perfect bodies. Sculptures were meant to celebrate man as the perfect creation of the gods. Sculpture didn’t show fat or wrinkles. Instead, it showed strong, muscular bodies.
Phidias was an important sculptor during the Classical Period. He directed the sculptors who created the Parthenon friezes (sculptures that are set into walls) at the Parthenon. Experts believe that Phidias designed the building and decoration. He also created the sculpture of Athena that stood at the Parthenon. Above is an example of a relief from the Parthenon.Experts also believe that Phidias created that huge sculpture of Zeus that stood at the Temple of Zeus at Olympia. The sculpture was seven times the size of a man. It was carved from ivory and decorated with gold. It is counted among the Seven Ancient Wonders of the World. Above is a drawing of what the sculpture may have looked like.More about Greek art:
Friday, August 1, 2008
Art Fraud Detective by Anna Nilsen
I was at the book store yesterday and came across a great book. Anna Nilsen’s Art Fraud Detective is a clever find-the-difference book that allows readers to compare paintings to slightly messed-up fakes.
The pages are split with the fakes on the top and the originals on the bottom. Each original painting appears next to an artist biography. The biographies are written for ages 9-12 but younger children can also enjoy studying the paintings.
Some paintings have not been changed, some have only one change, some have two, three, or four. Each painting that has been replaced with a fake includes a hidden symbol that tells you who created the fake. When you have studied every painting and discovered who created the fakes, you will be able to solve the big mystery: who is the good guy?
The book includes 34 paintings. Many are by artists you have already read about on this blog. Van Eyck, Botticelli, Raphael, da Vinci, Brueghel, Rembrandt, Vermeer, Degas, Monet, Seurat, Rousseau, van Gogh, and Picasso are all featured in Art Fraud Detective.
Return to main page.
Subscribe to:
Posts (Atom)


