


You may remember the marbling project I posted awhile back. I thought red and green marbled paper would make lovely Christmas cards. Mine can out nicely. Try it for yourself.
Supplies Needed:
Foam Shaving Cream
Blank Note Cards or Heavy Paper
Paint
Paintbrush
Cardboard
Plate or Tray
 Spray a layer of shaving cream, about half and inch thick, onto the plate. Use the edge of a piece of cardboard to smooth the surface.
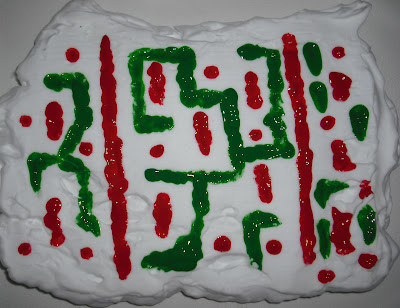 Paint on the surface of the shaving cream. Just scatter your colors across the top. The pattern doesn’t matter unless you’re trying to create a picture (see below). If you use washable paint for this project, your paint will run together when you remove the shaving cream from the card. I do not recommend it.
 Use the back of your paintbrush to swirl the paint around. When you like the marbled effect, press the front of your card into the shaving cream. Lift the card straight up and set aside.
Allow your card to dry for a few minutes, then use the edge of a clean piece of cardboard to scrape the shaving cream off the note card. Only the paint will remain.
 If you wish to make a picture, like a Christmas tree or a stocking, dab the paint in the general shape you wish to make. Swirl each part of the picture separately. For example, in the Christmas tree card below, I swirled the green, then wiped the end of my brush, then swirled the blue. I didn’t want my colors to mix.
 If you want, decorate your cards with words, glitter, or colored paper.
Place in envelopes and send to your friends and family. They are sure to enjoy these beautiful, handmade cards!
Return to main page.
Supplies Needed:
Foam Shaving Cream
Blank Note Cards or Heavy Paper
Paint
Paintbrush
Cardboard
Plate or Tray
Spray a layer of shaving cream, about half and inch thick, onto the plate. Use the edge of a piece of cardboard to smooth the surface.Paint on the surface of the shaving cream. Just scatter your colors across the top. The pattern doesn’t matter unless you’re trying to create a picture (see below). If you use washable paint for this project, your paint will run together when you remove the shaving cream from the card. I do not recommend it.Use the back of your paintbrush to swirl the paint around. When you like the marbled effect, press the front of your card into the shaving cream. Lift the card straight up and set aside.Allow your card to dry for a few minutes, then use the edge of a clean piece of cardboard to scrape the shaving cream off the note card. Only the paint will remain.
If you wish to make a picture, like a Christmas tree or a stocking, dab the paint in the general shape you wish to make. Swirl each part of the picture separately. For example, in the Christmas tree card below, I swirled the green, then wiped the end of my brush, then swirled the blue. I didn’t want my colors to mix.If you want, decorate your cards with words, glitter, or colored paper.Place in envelopes and send to your friends and family. They are sure to enjoy these beautiful, handmade cards!
Return to main page.


No comments:
Post a Comment